How to change brake pads – DIY
By Shenron on May 08, 2008 with Comments 5
After the enormous success of the original “How to change brake pads” article, we’ve decided to update it in a different style and with new information, so you can do it yourself (DIY).
If you are a car owner you already know just how important your brakes are. While the brakes on your car are extremely reliable, over time they wear down and need to be replaced. For most car owners, the entire brake assembly doesn’t need to be replaced- just the brake pads. Here is some information on how to change brake pads.

Drum Brakes and Disc Brakes
There are two types of brakes in vehicles today; however the vast majority of vehicles on the road have disc brakes. Drum brakes are the other type of brakes and are usually found on much older vehicles. This article will focus only on changing disc brakes.

How Your Disc Brakes Operate
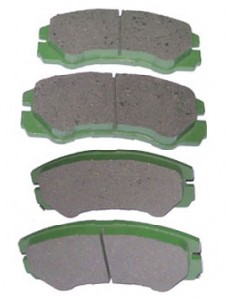
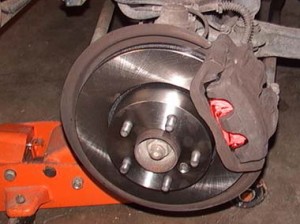
It is important to understand the principles of how disc brakes work in order to replace them effectively. A disc brake is made up of a few components: A caliper, two brake pads and a rotor. These three components are held together by a few bolts or clips depending on your vehicle and configuration. The calipers main job is to squeeze the brake pad toward a metal plate called the rotor. When the brake pads are squeezed against the rotor- this causes friction and ultimately causes the vehicle to stop. Since brake pads experience lots of heat and friction they are made out of specific types of substances such as ceramics.
Do Your Brakes Need to Be Replaced
Before you go out and change your brake pads, first inspect them to see if they do require replacement. There are a few tell tale signs to alert a car owner to the fact that their brakes need to be replaced. They include: if when depressing the brakes, you hear grinding or a screeching sound. The second way is to visually check your brake pads. You can jack up your vehicles tire and remove it. Then look at the actual brake pads. Usually a brake pad thickness of ¼ inch or less means that it should be replaced. In addition, if your brakes are worn unevenly, you should replace them as well. Finally, the front brakes are usually the first set of brakes to go. They account for the majority of your vehicles stopping power. When replacing brakes, you must always replace both sets (e.g. both front brakes or both rear brakes).
Change Your Brake Pads
Before you actually change your brake pads, you should first prepare your car. You will need to lift your vehicles tires off the ground using a jack or stands. Most car owners usually lift both front tires off the ground at once or if you just have a standard jack, lift one tire off the ground at a time. Make sure to use tire blocks to keep your car safe and secure.

Step 1. Gain Access to the Brake Pads
Once your vehicle is securely lifted off the ground and stable, remove the tire or tires gaining access to the brake pads.
Step 2. Remove the Calipers & Check the Pads and Rotor
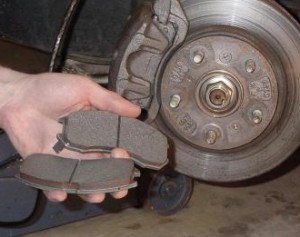
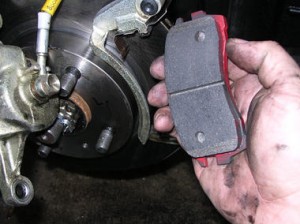
As stated above the calipers squeeze the brake pads. In order to remove the brake pads, you must first remove the calipers. Calipers are usually held together using simple bolts or clips. They should easily be able to be removed. Once you have access to the brake pads, inspect them to ensure they are worn out and need to be replaced. In addition, check the rotor- the shiny piece of metal. If the rotor looks badly worn out or warped it too needs to be replaced. In some cases, a scored rotor can be shaved down, making them smooth again. This way you just need to do a little maintenance on them instead of replacing them completely.
Step 3. Prep for the Installation of Your New Brake Pads
Once you have the old, worn out brake pads off your vehicle, go down to the auto parts store and buy a replacement. If your rotors were damaged, they should be replaced as well. In addition to buying new pads and or a new rotor, pick up a small tube of brake grease.
Once back at your vehicle, before you place your brake pads back on your car, you will need to reposition the caliper back into place. Moving the caliper back to its full open position is quick and easy, just find the back portion of the caliper and move it back- usually moving it back means moving the caliper toward the center of the vehicle. If you have difficulty, use a vice grip for better hold. Now that the caliper is back to its full open position, prep the brake pads by applying a little brake pad grease to them. The grease goes on the back of the pads.
Step 4. Reassemble the Brake Pad on Your Vehicle
Once you have greased up your brake pad, you can install them back onto your vehicle simply by reversing the steps. First install the brake pads onto your calipers, then clip or bolt your caliper back on and then placing the tire back onto the axle.
Once you lower your vehicle from the jack, ramp or stands, make sure you tighten the wheels. In addition, before you start driving your vehicle normally, make sure your vehicle stops correctly. With new brake pads, you may see some dust or hear screeching noise for the first few days- this is common due to the newness of the pad.
Replacing your brake pads is generally an easy to moderate project. However, if your vehicle has anti-lock brakes or looks complex, one of the best ways to accomplish this task is by buying a car repair book for your specific vehicle. These books generally have lots of diagrams and installation instructions that make the entire process much easier to understand. If you still don’t feel comfortable or are unsure of exactly how to replace your brake pads, consult with your local car mechanic.
Filed Under: General

sweeeeeeeeeeet brooooooooooooo
i took the caliper off my front brakes of my 06 e class and the fluid ran out. after inspecting the system i think i may not have to remove the caliper to change the pad. but now i think i have to bleed the brakes, which i tried but no fluid came out. can you tell me how to change the pads and bleed the brakes if i pay you will you follow this through until i am satisfied
Thx for your comment.
I really suggest you search for a local mechanic as it’s virtually impossible to give you remote help on that issue.
Thx!
where was this published thanx
The original article can be found here: http://www.cartuningcentral.com/how-to-change-brake-pads